Getting started
Install Photovibe on Windows, open your first photo, and learn your way around the workspace.
Photovibe is a desktop photo editor that runs entirely on your own machine. There is no account to create, nothing to sign in to, and no image ever leaves your computer.
Install
- Download the installer from the download page. It is a single
.exeof a few megabytes. - Run it. Photovibe installs for the current user only, so it does not ask for administrator rights and does not touch system directories.
- Launch Photovibe from the Start menu.
Windows may show a SmartScreen prompt the first time a new version is published, even though every installer is Authenticode-signed. Verifying your download explains what the signature is and how to check it yourself.
The workspace
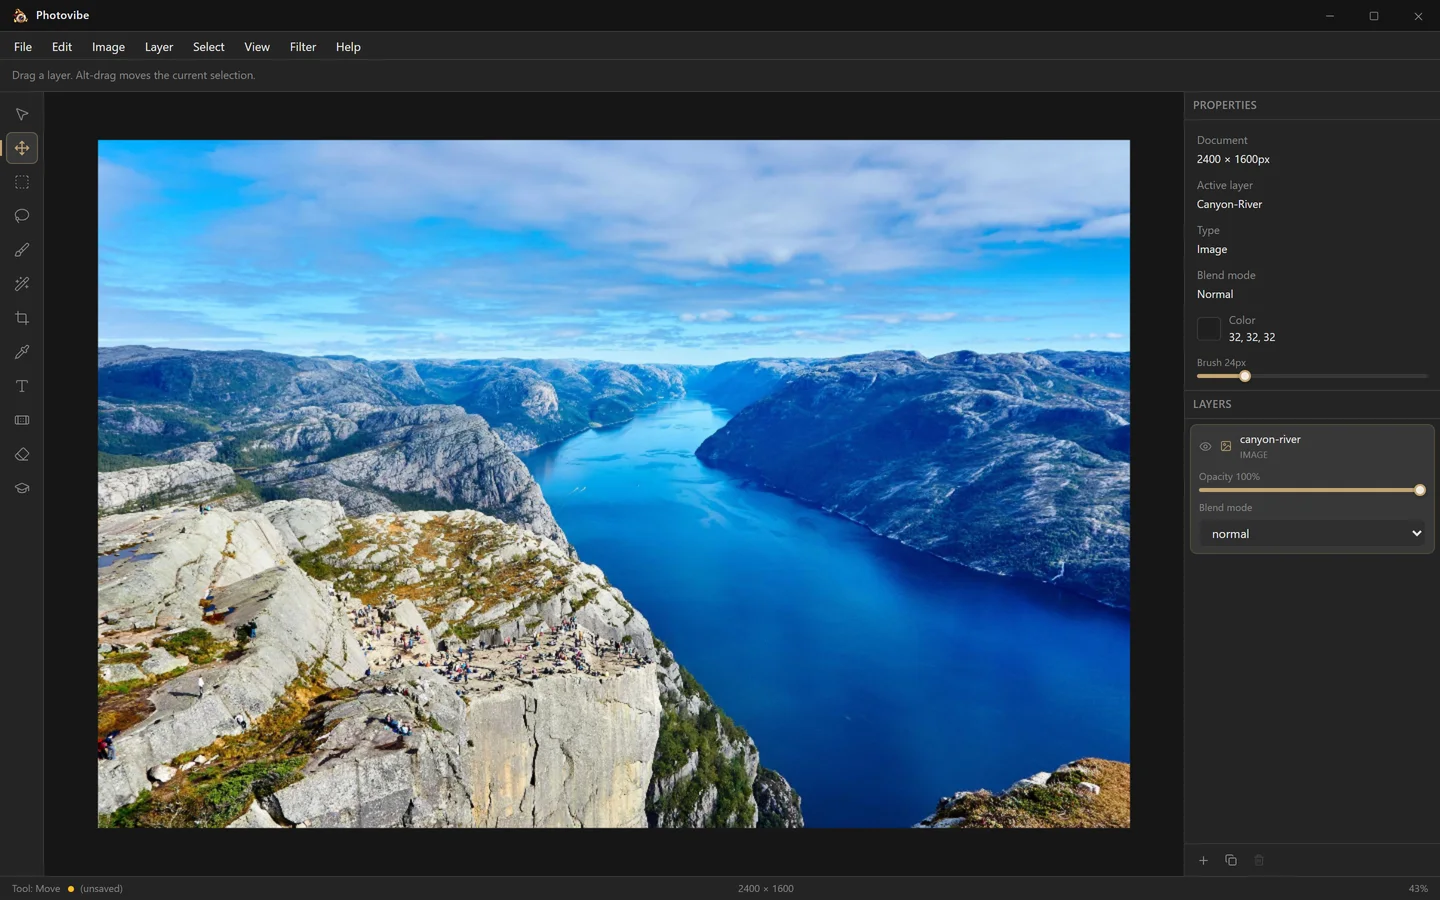
Photovibe uses a familiar dark, single-window layout:
- Menu bar — File, Edit, Image, Layer, Select, View, Filter and Help.
- Options bar — the row under the menus. Its contents change with the active tool: brush size for the brush, font and size for text, and so on.
- Toolbar — the tool column down the left edge. Every tool has a one-key shortcut.
- Canvas — your document, on a checkerboard that shows through transparency.
- Properties — document size, the active layer, its type, blend mode and colour.
- Layers — the layer stack, newest on top, with opacity and blend mode for the selected layer.
- Status bar — active tool, saved state, document size and zoom level.
Open a photo
File → Open… (Ctrl+O) accepts PNG, JPEG and WebP. The image becomes the bottom layer of a new document sized to match it, and the view zooms to fit.
You can also start from a blank canvas with File → New… (Ctrl+N), choosing the dimensions and background yourself, or paste an image straight from the clipboard with Ctrl+V.
Move around
| Action | How |
|---|---|
| Zoom in / out | Ctrl++ / Ctrl+-, or the scroll wheel |
| Fit to screen | Ctrl+0 |
| Actual size (100%) | Ctrl+1 |
| Pan | Hold Space and drag, or two-finger scroll |
| Show a grid | View → Show Grid |
Save your work
File → Save (Ctrl+S) writes back to the file you opened.
File → Save As… (Ctrl+Shift+S) asks where to put it.
The status bar shows (unsaved) whenever the document has changes that are not yet on disk.
Every step you take is undoable with Ctrl+Z, and the Edit menu names the exact action each undo will reverse.
Next
- Tools and shortcuts — all twelve tools and every keyboard shortcut
- Layers and blend modes — stacking, opacity and the thirteen blend modes
- Selections — marquee, lasso and magic wand